Installation #
1. Download the plugin (.zip file).
2. In WordPress Dashboard go to Plugins > Add New.
3. Upload the plugin by pressing the upload button.
4. Activate the plugin.
5. In the Ultimate Affiliate Pro plugin dashboard, go to the navigation menu and find the EXTENSIONS tab. Upon clicking the menu item, a box with the WooCommerce Product Discounts module will be available.
Setup #
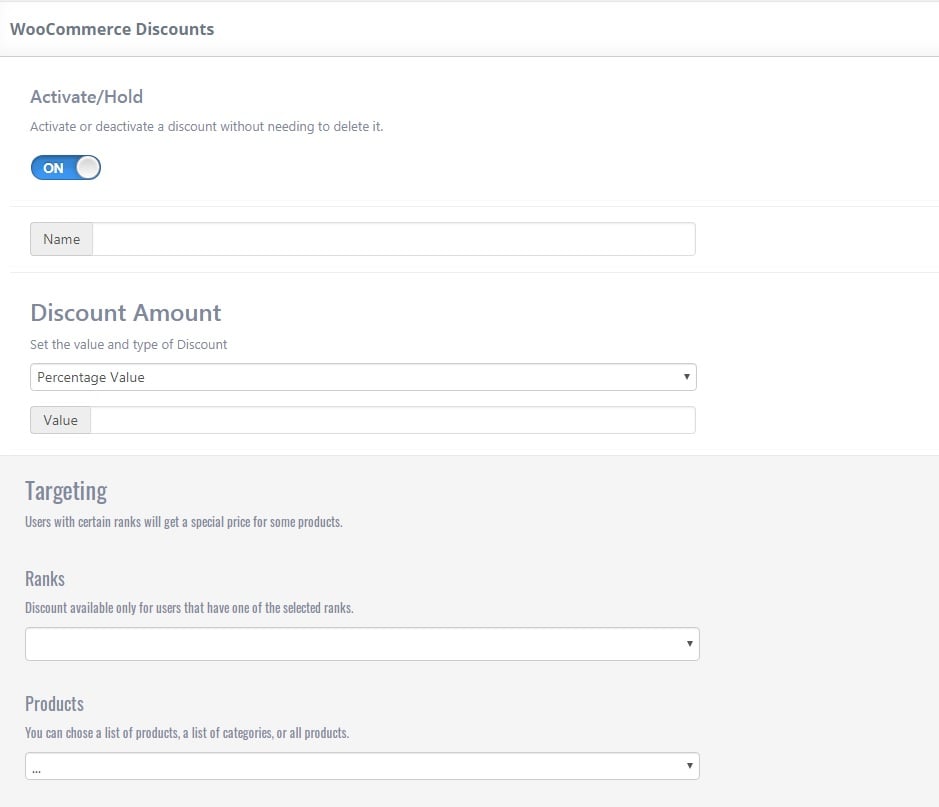
1. WooCommerce Product Discounts module can be enabled or disabled by pressing the “Activate/Hold” switcher button from the module panel.
2. To create a discount, go to the submenu tab Manage Discounts and click on “Add New Discount”.

3. Discount can be enabled or disabled by pressing the “Activate/Hold” switcher button without needing to delete it.

4. In the “Name” field, add a name for your discount.
In the Discount Amount area, you may choose how the discount value will be applied. It can be “Percentage Value” or “Flat Value”.
In the “Value” field, you can set the value. It can be a digit or a number.
In Targeting area, a discount can be applied based on “Ranks” and “Products”.
In “Ranks” field, you may choose if the discount will be available for all ranks or for users who have one of the selected ranks.
In “Products” field, you can specify a list of products or categories, or even all products for which the discount will apply.
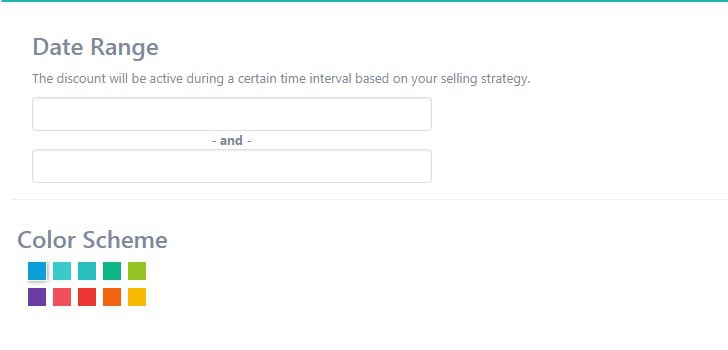
5. In the Date Range choose a time interval in which the discount will be active.
Based on your selling strategy, you may choose a color in the Color Scheme for your discount in order to make it easier to distinguish.
6. After you create a discount, go back to the Settings submenu tab.

7. In For Products With Multiple Discount Values Set, you may choose what type of discount will be applied.
“Biggest final Price” means that if a product has multiple discounts, for the final price, the smallest discount will be applied.
For “Smallest final Price”, products will benefit from the biggest discount.
In “Show Regular And Sale Price” you can set if both prices will be displayed in the shop.


